20 Helpful Photoshop Tutorials in Making Buttons and Badges

In this article we are going to showcase some tutorials to create buttons and badges in Photoshop, which really help you to improve your website designing skills. This post will teach you to create your own buttons and badges for your website. We list 20 Helpful Photoshop Tutorials that teach you making Buttons and Badges with ease.

(more…)


ThemeForest Theme Sells Over 800 Copies In One Week

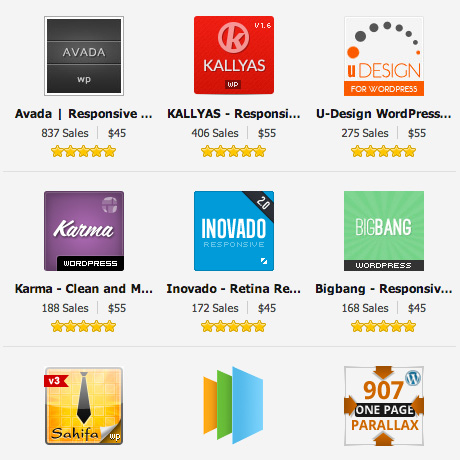
One WordPress theme, 7 days, 800 copies, $36,000 grand. A lot of WordPress authors and developers on Themeforest would love to achieve even a fraction of that and most of them are probably scratching their heads wondering why. This popular theme has even dislodged U-Design from its top spot for the past few weeks and to think it’s the only item in this author’s Themeforest portfolio. If you are wondering what theme achieved such a feat check out AVADA, a responsive multi purpose theme created by ThemeFusion.

Let’s dissect this theme a little bit further and try or simply attempt to figure out why the market is loving this theme.

Overall aesthetic

Avada’s layout can be classified as clean, straightforward, and professional-looking with very neutral colors and lots of white space. If you are familiar with real estate open houses, real estate professionals really spend a lot of time to “stage” a property before “opening” it up to the market. Care is taken to display only enough design elements to highlight the property’s unique and outstanding features, pulling back from adding unnecessary and distracting clutter. This deliberate “staging” is intended to give the potential buyer the room to imagine what he can do with it to meet his own needs. The focus is on its potential and what it can become. Avada is like that, a well-staged theme with lots of potential for all types of buyers. The demo is clear and easy to maneuver, giving customers a taste of all that it can be for whatever need they have.

Features & Functions

This premium theme is not just a pretty face. It has enough built in features and functions to create the website you need for yourself or for your clients. Everyone wants to create a website that is unique and representative of himself or his brand. Avada has a plethora of feature and function choices that, when mixed and matched together, with the client’s own images and content, can create a one of a kind and totally different website every time. Here are some of Avada’s easy to customize features that you can “play” with:

  • Homepage – 10 versions
  • Sliders – 6 styles
  • Headers – 5 versions
  • Page Templates
    • About Us – 2 versions
    • Services – 2 versions
    • Pricing Options
    • Meet the Team
    • Side Navigation
    • Contact Page – 2 versions
    • FAQ – 2 versions
    • Sidebars – Left and Right
    • Full-width page
    • 404 page
  • Portfolio – 6 layouts
  • Blog – 4 layouts
  • Custom Posts, Custom Widgets,
  • Shortcodes for Elements, Icons, Media, Pricing Tables & Typography
  • Responsive
  • Retina-ready

Support

Aside from the extensive, detailed documentation and easy to follow HD narrated video tutorials, Avada generously includes the entire set of PSDs (20+ files) for those who want to customize the theme even further. Buyers get 100% free support via their support forum. Customer feedback has been, overall, favorable so far. Providing WordPress theme support is not an easy task especially if you are servicing thousands of buyers. To receive favorable feedback regarding their theme support indicates that they have a support system that really works. This translates into higher buyer confidence which translates further into higher sales.

Avada has sold almost 15,000 copies to date and has received more than a thousand 5-star ratings which is something worth noting. Receiving a 5-star rating from 2 or more people can be easily dismissed but 1,000 or more satisfied customers can’t be ignored.

Fluke or luck? We think not. A good product with a lot of hard work backing it up sounds more like it. If this is the trend that the market is supporting as far as WordPress themes are concerned, then it is good sign that the market and the industry are headed for better days.

Get Avada Now!

Understanding 401, 301 and 302 Redirects and How It Affects Your SEO

Google Panda now includes improving user experience as one of the key factors in attaining a high website quality score. This means that website owners now need to conduct regular site wide audits to see if their website contains any broken or dead links that could affect user feedback. Broken or dead links frustrate and annoy users and if this happens often enough on your website, these users will leave, resulting in a higher bounce rate on your site. Links that lead to nowhere are one of the most common complaints on the Internet. Not good for user experience and definitely bad for SEO.

To redirect is to direct someone to a different location or by a different route. Your web server returns several error messages when encountering a problem such as broken urls, inactive web pages, new website, new web page, or probably site under construction. When this happens, users get redirected knowing or unknowingly.

Here are the most common ones you need to pay attention to:

The 301 Redirect

301 Redirect, also known as a permanent redirect, means you are permanently moving content previously existing on a page or an entire site, including all the attributes, qualities, links, PageRank, Page Authority, and SEO juice that belong to it, to a new url of your choice. It is the most efficient and most SEO friendly way of redirecting your traffic after a change in permalinks. 301 redirect maintains your search engine rank and re-indexes your pages, posts and everything else on the basis of your new permalinks.

The 302 Redirect

302 Redirect, also known as a temporary redirect, means you are temporarily moving content previously existing on a page or an entire site, to a temporary location. This also means that you may bring back the old url in the future. This type of redirect does not transfer any of the SEO juice and value of the original page. 301 Redirect is often used specifically when testing a new page for client feedback or when your site or page is undergoing maintenance.

The 404 Error Page

404 Redirect occurs when a customer on your site tries to access a pagename that doesn’t exist. These are dead pages that link nowhere and gives users a bad experience. If these pages remain unfixed, Google will de-index these pages and all the valuable links, rank, SEO juice, and authority attributed to these pages will be wasted. 404 Error pages that are not redirected will annoy users and make them leave your site immediately. You can, however, always add 301 redirect it to homepage, to take advantage of link juice or even create a custom 404 page to redirect them to another page you like.

Errors are unavoidable and links do get broken that is why it is always a good practice to do site maintenance regularly and check and double check all your links on your website to see if they are active.


Panda Proofing Your Website

If your website has been hit by Panda and like most, you’ve began making improvements and implementing changes to your website immediately after, you might not be able to see the effects right away. It might take a while but it is possible to reverse the fall and recover from Panda.

Eric Lancheres, SEO Guru and sought after speaker, shared, in the recently held Traffic and Conversion Summit 2013, a few tips and tricks on how to Panda Proof your website.

Here are some of them:

  • Include Date Posted and Last Updated when posting articles/content.
  • Have pictures cut right at the fold. Try to tweak landing page pictures at the fold.
  • Plant 2-3 comments to get the ball rolling. Encourage comments from users.
  • Add social media buttons and ask friends to add comments votes and likes.
  • Manually add relevant or recent articles in the sidebars.
  • Improve bounce rate by using Pagination + Table of Contents. More pages lead to more pageviews. Easy to read pages encourage user engagement and interactivity which translates to spending more time on your website. More activity and more action from users translates into high quality perception for Google.
  • Increase visitor engagement by interlinking your articles. A good example of proper internal links execution is Wikipedia.
  • An intuitive dynamic navigation is key to having a high quality score. If supplementary content is not available, you CANNOT have a high quality ranking Sidebar navigation is your supplementary content.
  • Speed improves everything. Site load under 4 seconds load time is acceptable. Server load speed will increase all your metrics by about 1%-5%. Check your page load speed. If it too slow, you need to start optimizing your site. Try resizing your images, or, if necessary, consider moving to a better server.

Implementing all these changes plus improving the quality of your content will help you recover whatever lost ground your website experienced because of Panda. Of course, there will always be a lag in seeing the results of these changes between the time you implement them and the next Google update. Panda is here to stay so you need to work on improving your site including your business model. Keep working at it. Eventually, your traffic will improve, visitors will have a better experience on your website, and you should be able to earn more money than when you started.


Free Designer Resources for your WordPress Theme: Icon Sets

Sometimes all it takes to add the finishing touch to a drab design is choosing the right design element. There are numerous resources available online but sometimes it gets too overwhelming to search for them. We’ve found a few design resources that you might be able to incorporate into your WordPress theme design:

Free Outline Icons from Vandelay

these minimalist, outline style icons designed by Grandiz for Vandelay Designs will go well with Swiss-style, white spaced WordPress themes.

Free Brands Icons from Smashing Magazine

Smashing Magazine is giving away Simple Icons by Dan Leech. This set contains 100 white icons that have transparent backgrounds and can be used for popular websites, apps and organisations.

Free WordPress Post Type Icons from Fribly

Add some style to your custom posts with these sticker type icons. Icons are transparent and in png format. They include: status, link, quote, video, audio, image, gallery and aside. May be used for both personal and commercial projects.

Social Media Icons from Harkable

These sharp and sleek social media icons will add polish to any WordPress theme. Add that extra wow to your website using these icons. (PSD and PNG format)

Clean and Colorful Social Media Icons for 2013 from Mascot Agency

These simple yet vibrantly colored icons have that Windows 8 graphic quality about them. More icons are included in the actual download.

Icons are a great way to add a signature look to your website when done the right way. Enjoy these free resources to add that signature look to your site.


45 Realistic Colored and Black and White Pencil Portrait

When there was no camera in past days drawings and paintings are the only source, as days pass on camera have been invented. But still Pencil drawings did not loose any demand or craze.
Do you love pencil drawings, Then this post is for you. There are some artists who really create miraculous with their pencil, You cant even recognize which is real and which is painting or drawing.

Experience this presentation of 45 Realistic Colored and Black and White pencil Portrait drawings for Inspiration are displayed and get started with your creativity. Explore the minute details of each pencil drawing and get inspired to create your own.

(more…)


Explore Your WordPress Settings for WP Beginners

Getting to know your WordPress Settings is like learning to drive a car. You don’t necessarily have to know how everything works under the hood but you do have to get to know all the knobs, dials, buttons, and controls that will make it start up and run before you can get anywhere. Exploring the different WordPress Settings and functions on the left hand side of your admin panel will help you direct and control the way you want to run your WordPress website and how far you can take it.

If you are a WordPress beginner eager to post and publish content you need to get to know the Settings Administration menu in the Admin Panel.

Here are the default options you will find when you click on the Settings menu.

General – This is the default screen and controls the most basic configuration settings for your site such as:

  • Site Title – the name of your site or blog
  • Tagline – a catch phrase or short description of your site
  • WordPress Address – the full url of the directory containing your WordPress core application
  • Site Address – the address you want people to use when searching for your website
  • Email address – the email address where you want communication sent
  • Membership (if you want to open registration to other users)
  • New User Default Role – the default status or position of new users
  • Timezone – choose the timezone of your location
  • Date format
  • Time Format
  • Week Starts on – choose your preferred day to start your week

Writing – control the way you write and publish your posts

  • how you add new posts
  • adjust the post box size
  • set your post format and how you want graphics like emoticons are displayed
  • set your default post category
  • set how you want “Press this”
  • set remote posting permissions – via email or mobile

Reading – this module allows you to:

  • set how the front page displays your posts
  • set a static page for the front page and the posts page
  • set how many blog pages to display
  • set how many posts to display on syndication feeds
  • show full text or excerpts of blog posts
  • set search engine visibility
  • preset email acknowledgments and replies to recent followers and commenters

Discussion – this module allows you to define

  • default article notification settings like pingbacks and trackbacks
  • moderate and manage comments, permissions, approval, blacklists
  • email notifications for comments
  • manage user avatars

Media – this module allows you to set by default how images, documents and other media files included in a post will be processed and organized. You can also preset the image dimensions (thumbnail, medium, large) in this section although you can still do further edit while adding a new post.

Privacy – this option has been moved to the Reading module in WordPress 3.5 under Search Engine Visibility.

Permalinks – are the permanent URLs to your individual weblog posts, as well as categories and other lists of weblog postings. A permalink is what another weblogger will use to refer to your article (or section), or how you might send a link to your story in an e-mail message. Because others may link to your individual postings, the URL to that article shouldn’t change. Permalinks are intended to be permanent (valid for a long time). There are several third party plugins you can also install to customize the structure of your permalink to optimize your SEO visibility.

This list gets longer once you install new plugins or other third party functions included in other WordPress themes you choose to install. Once you have decided on how you want your site to function you can define and select all your parameters, save your Settings and enjoy publishing your content the way you want and as much as you want.


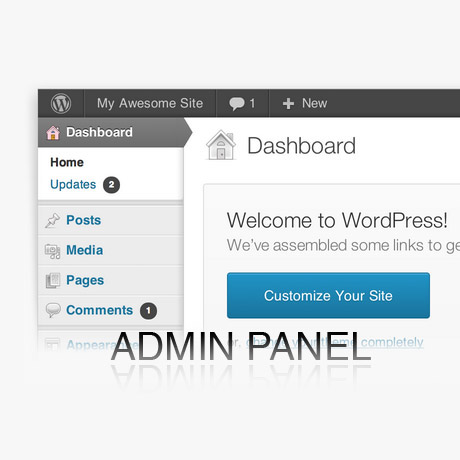
WordPress Admin Panel

Navigating your way around in the backend area of your WordPress website need not be complicated even if you are a beginner. The WordPress Admin Panel area found in the backend is a powerful and flexible area where you can manage your website content and other WordPress functions. It has continually evolved since 2003 and with the help of and contributions from the WordPress community has improved and become more and more beautiful and user friendly.

The Administration Panel provides access to the control features of your WordPress installation. Each Administration Panel is presented in sections:

The Header

The top portion of all Panels, the header, is featured in dark shading. The header shows the name of your blog as a link to your blog’s main page, comments awaiting moderation, +New to add new posts, pages, media, or users, a Search Engines Blocked message if you Privacy settings block search engines, a favorites menu, and links to your profile (shown as your user name), and Log Out. Just below the top shaded area are two hanging tabs, Screen Options and contextual Help, that can be clicked to expand them.

The Main Navigation

On the left side of the screen is the main navigation menu detailing each of the administrative functions you can perform. Two expand/collapse arrows just below the Dashboard and Comments allow the navigation menu to collapse to a set of icons, or expand (fly-out) to show an icon and description for each major administrative function. Within each major function, such as Posts, a pull-down arrow is presented upon hovering mouse hovers over the title area. A click of that arrow expands the menu to display each of the sub-menu choices. Clicking that arrow again collapses the sub-menu.

The Work Area

The large area in the middle of the screen is the work area. It is here where specific information relating to a particular navigation choice, such as adding a new post, is presented and collected.

The Footer

Finally, in the footer, at the bottom of each Administration Panel in dark shading, are links to WordPress, Documentation, and Feedback. In addition, the version of WordPress you have installed is shown. Just below the menu tab section, if your version is NOT the latest version, you will see the message An updated version of WordPress is available. Please update now. Click on the provided link to navigate to the Updates SubPanel.


Below is a list of the submenu items you will find in your default WordPress Admin Panel main navigation menu. Some of them may or may not be included depending on the WordPress version you have installed.

Dashboard

The Dashboard tells you about recent activity both at your site and in the WordPress community at large and provide access to updating WordPress, plugins, and themes.

WordPress Updates

This sub panel gives you an easy method to update WordPress, plugins, and themes. Note not all hosts will allow the automatic update process to work successfully and will require you to manually upgrade by following the Upgrading WordPress instructions.

Posts

This sub panel is where you can publish writings, compositions, discussions, discourses, musings, and, yes, even rantings, of a blog owner and contributors. Here you can write new Posts, create new Categories, new Tags, and new Custom Fields. In addition, any Media (pictures, video, recordings, files) can be uploaded and inserted into the Posts.

Media

This sub panel allows you to upload new media to later use with posts and pages. A Flash Uploader is provided and the ability to use a Browser Uploader is supplied if the Flash Uploader does not work.

Pages

A good example of a Page is the information contained in About or Contact Pages. A Page should not be confused with the time-oriented objects called Posts, nor should a WordPress Page be confused with the word page referring to any web page or HTML document on the Web. In this Sub Panel you can select the Page to edit or delete. Multiple Pages can be selected for deletion and for editing. As with Posts, a powerful bulk edit tool allows certain fields to be edited for a whole group of Pages. A handy in-line edit tool, called Quick Edit, allows you to update many fields for an individual Page. Various search and filtering options allow you to find the Pages you want to edit or delete.

Comments/Reader Feedbacks

Comments are a feature of blogs which allow readers to respond to Posts. In this sub panel you can edit and delete as well as mark comments as spam. Comments that are awaiting moderation can be marked as approved or previously approved comments can be unapproved. Multiple comments can be selected and approved, marked as spam, unapproved, or deleted. A section at the top of the Comments SubPanel displays the number of comments awaiting moderation and the number of approved comments. A search box allows you to find specific comments.

Appearance

From the Presentation Administration Panel you can control how the content of your blog is displayed. WordPress allows you to easily style your site by either installing and activating new Themes or changing existing Themes. This sub panel includes customization controls for Themes, Widgets, Menus, Background, Header, and Theme Editor.

Plugins

Plugins allow you to add new features to your WordPress blog that don’t come standard with the default installation. This sub panel allows you to view the plugins you’ve downloaded, add new plugins, modify the plugins and choose which plugins you want activated on your site.

Users

Every WordPress site probably has at least two users: the admin, the account initially set up by WordPress, and the user account you, as the author/owner of the blog. This sub panel allows you to set up all of the user accounts you need, change user information, assign roles, or delete users.

Tools

WordPress Tools provide you the ability to speed up WordPress for your local machine, import content from other sources, export your content, or to upgrade your WordPress software to a new release. This includes the Import, Export, and Press This functions.

Settings

The Settings Administration Panel contains all of the settings that define your website as a whole: settings which determine how your site behaves, how you interact with your site, and how the rest of the world interacts with your site. This sub panel includes control settings for: General (basic configuration settings), Writing, Reading, Discussion, Media, Privacy, and Permalinks
(source: WordPress codex)


The backend or Admin Panel may vary from theme to theme. The look and appearance may vary depending on the customizations and tweaks done by authors and developers. Nevertheless, no matter how Admin Panel is tweaked, these basic functions are standard and generally remain the same no matter what WordPress theme you install.


Simple SEO Tips for Startups

Hello World! That’s the first thing that greets you see when you start a new website. You’ve successfully created your first post and you’re ready to fill it up with more content but you are probably wondering if anyone at all will get to read what you have written.

Here are some simple Google-approved SEO tips for Startups:

To WWW or not

  • use a 301 to consolidate indexing signals because it is a permanent redirect and signals to search engines to transfer all the indexed properties from your non-preferred (www) to your preferred version (non-www) or vice-versa

Verify ownership in Google’s Webmaster tools

  • enable email forwarding to receive critical messages from Google in case of hacking, malware, or crawling issues

Domain background check

  • check for previous ownership (spammers), unwanted keywords and index results – inform Google for any penalties or reconsideration requests

Use the Fetch as Googlebot Webmaster Tool

  • to tell Google to crawl and submit the url to index making it available to searchers even faster.

Include Analytics Code to gather data

  • see which pages are popular and which are not

Site Design Strategy and ideas

  • utility
  • navigation
  • focus

Define your conversion or call to action

  • what you want your visitors to do
  • newsletter signup
  • contact you for a business lead
  • buy
  • try
  • share

Smart copy

  • Include query terms normally or commonly used to find your products.

Every page should be unique

  • unique topic
  • unique title
  • unique meta description
  • for non-dynamic sites – keywords in the filename (lowercase and hyphen separated)
  • descriptive anchor text for every link

Page load time or speed

  • the longer the page loads the more likely the user will leave the site
  • customer acceptability for ecommerce sites = 2 seconds
  • Google = under half a second
  • Ranking – find your audiences and interact with them
  • provide an awesome product or service
  • natural links
  • +1s
  • likes
  • follows
  • shares

Social Media Marketing

For more information and tips, check out the GoogleWebmasterhelp video on YouTube. For those who want to know how to do this, WPMU.org has a quick and easy tutorial on how get started using Google Webmaster Tools for WordPress.